|
|


"Thank you for your logical explanation
and graphics as how to apply the
suggested fix, which has worked very
well in my case."
A. Mott in Blackburn, Victoria, Australia
A. Mott in Blackburn, Victoria, Australia
I was plagued by this error which frustrated me
repeatedly. There was little or no documentation
on the Samsung website. For months I was
chasing my tail continually changing the video
card resolution or running in WIndows "SAFE"
mode to no avail. I was told it was heat or driver
related - WRONG!
Running out of space on your Cisco/Scientific Atlanta
Explorer 8300 High Definition PVR/DVR? You could
simply and easily just swap out the hard drive!
Like many of you, I can never seem to have enough hard drive space on my
cable PVR. Depending on where you live, you migh also call it a DVR. I've always
been curious about how things worked and since I owned my unit and it was well
past the warranty period, I decided to rip off that "void if removed" seal on my
unit and peek inside....
Since I had nothing to lose, I knew that it wouldn't hurt to open up the unit and peek inside. Before I could get started,
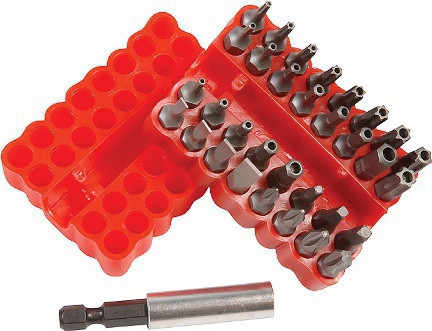
I was faced with those pesky security Torx screws. First stop, my local electronic supply store. I picked up a set of
security Torx bits that fit in my power screwdriver. I picked up a set on sale at Princess Auto in Toronto (available
nationally). Total cost was about $7.50. If you don't have access to a kit locally, you can have success by using a small
screwdriver or awl and simply pry off the centre security pin. It might take some time, but it will work.
With that out of the way, I opened up my Cisco Explorer 8300 Cable HD PVR/DVR with its 160Gb hard drive and couldn't believe what I saw.
With that out of the way, I opened up my Cisco Explorer 8300 Cable HD PVR/DVR with its 160Gb hard drive and couldn't believe what I saw.
The operating firmware for the CIsco 8300HD is
on the motherboard. NO FIRMWARE or
operational control is on the hard drive itself.
The Cisco Explorer 8300HD PVR while discontinued years ago, is still quite popular and widely distributed by many cable companies in North America. A little bit of online research revealed a few things that made it that much easier to find a suitable hard drive. The SD and HD units use exactly the same hard drives. Initially the units shipped with 80, 160 or 320 Gb hard drives. The last versions of the 8300HD shipped wth 500Gb hard drives which was the physical design limit of the unit. If you have an 8300 with a 500Gb hard drive. You've reached its limit and sadly cannot add any additional space. If your 8300 has an 80, 160 or 320 Gb drive, you can replace it!
The OEM drives that shipped with the Cisco
8300 PVRs were 5400 RPM. They also use the
older IDE controller for the I/O. In my case I
was able to purchase a used 500 Gb hard
drive from a friend for $20.
The replacement is very straight-forward. The PVR has a single IDE control cable and a standard power plug.
Be sure you ground yourself (drives hate static electricity) and proceed to unplug your PVR from the outlet.
Any 5400 RPM IDE drive will work. It doesn't need to be formatted since the Cisco hardware will look after that for you.
I use this 33-piece Torx Security set that I picked up at Princess
Auto in Toronto. I has both Torx and hex security bits
While I have not replaced or researched hard drive replacements for other Cisco PVRs, if you own your PVR like I do, swapping out drives
is always an alternative to PVR replacement. If you rent your PVR from your cable provider, opening up the unit is not a good idea. You're
renting, ask for the newest and greatest version available.
Here are the simple steps to installing a new hard drive in your Cisco 8300HD PVR:
Remove the Torx security screws on the back of the PVR.
Locate and disconnect the power plug and IDE control cable connector from the hard drive.
Unscrew the hard drive from its harness using a Philips screwdriver.
Reverse the steps with your replacement drive.
Once you confirm everything is tight and ready to go, turn on your Cisco PVR. It will detect the replacement drive and begin a drive format process. It will take approximately 30 - 60 minutes.
During the formatting process, the display will cycle hexadecimal information (gobblygoop to those who are non-technical).
Once the format process is complete, the display will revert to the clock and auto-tune to channel 1.
That's all there is to it. Enjoy.